As a gift, I recently took photos of my friend’s now 3 month old daughter. A very cute, little doll of a baby. Her sweet face needed to be captured and I knew I wanted to make her parents a Bonté photo book with all of the photos I had taken.
Here’s how I created that photo book, step by step.
1.Get started: After going to bontebooks.com I clicked on the Get Started button which took me to this page.

2. Upload images – I started by clicking on Manage Your Photos and then began uploading all of the images that I took of little Emma. As you can see, you could also use your Facebook, Flickr or Photobucket photos as well.

3. Create a Photo book: After I uploaded the images, I was taken back to the Get Started page. Now I clicked on the Create a New Photo Book button.

4. Choose a book size/type: A total of 6 different photo book sizes are available. I choose the 8×8 size. I love the look of the square photo book and it’s just the right size for this project.

Then I was given the choice between an image cover or a cloth cover. It was a hard decision but I decided on the image cover. I wanted a photo of baby Emma as the cover so that was the first thing her parents see.

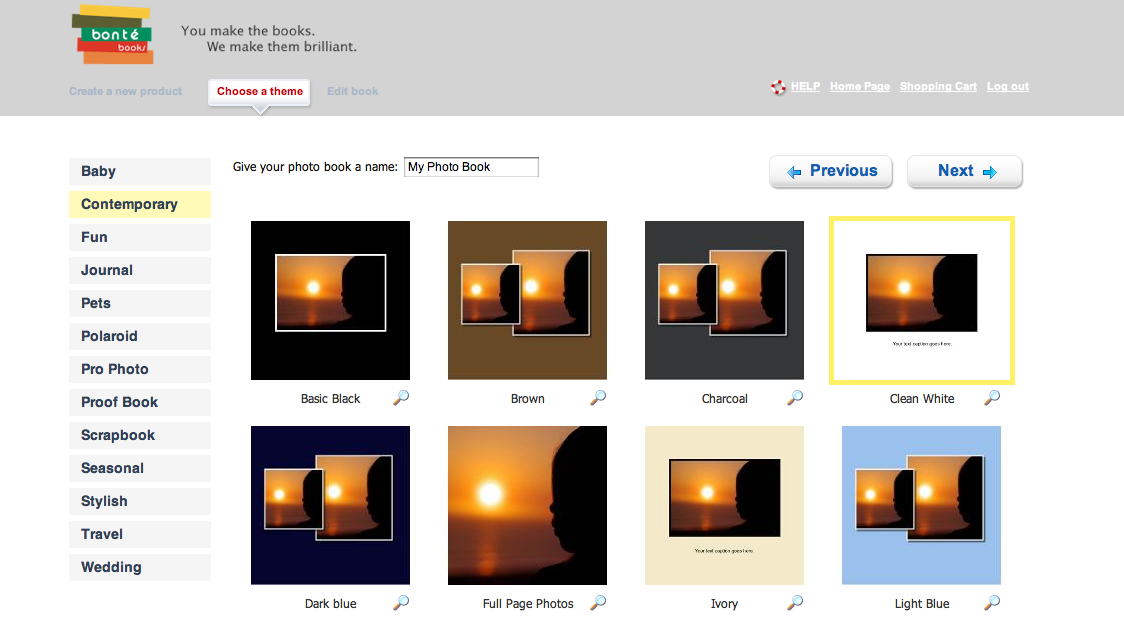
5. Choose a Theme: There are many themes to choose from so now is the time to decide. But don’t stress out too much. You can change the theme throughout your book making process. Literally every page of your Bonté photo book could be a different theme. (I’m not sure exactly why you’d want to do that but you could and that’s all that matters.) Go theme crazy – you’re given complete control. I decided to go with a simple look to let the photos of Emma be the main focus. I choose the Contemporary theme in clean white.

6. Layout the cover – I made the cover full bleed by clicking on the “magic wand” icon on the photo. As you’ll see below the lock box is checked. Click the box so that it isn’t checked to unlock the photo. Then I moved and expanded the photo until the cover was ah, completely covered. ; ) Then I added a title to the cover and started designing the rest of the book.

Here’s the cover with the photo and a small title.

7. Design the Pages – Here’s an example of a spread I did using the Pro Photo theme. I just clicked on themes and selected Pro Photo and found this page layout. I liked that it used multiple shots on one page because I wanted to show all of her cute baby expressions.

8. Icons: Once you’re done laying out the pages, it’s important to click on the icons located below the pages.

- The first icon (page with a + sign) lets you add a page – either to the left or the right.
- The second icon (page with a – sign) lets you delete a page – again either the left or the right.
- The third icon (4 pages) shows the layout of your photo book and let’s you rearrange the pages.
- The fourth icon ($) shows you how much your photo book will cost.
- The fifth icon (the gear icon) is very important. This is where you can add spine lettering. Click on it and you’ll see this:

9. Preview your book: Once your book is completely laid out you can click on the preview button to see your book page by page. I used this to make sure everything was exactly how I wanted it ( i.e. spelled correctly and all of the photos were in the correct order.) If you’ve selected a linen cover this is where you can select the linen color you would like and preview the selection. Just go to the cover and you’ll see a drop down of the 14 different colors to choose from.

10: Order your book: Once I was happy with the layout and made sure everything was spelled correctly, I ordered my book! Just clicked on the order button and was taken into the shopping cart where I reviewed the cost. You can also add a coupon code here if you have one. Then click through and you’ll be asked your address/credit card information, typical stuff.

Then…. Ta Da! You’re done. Once your order is sent, Bonté takes between 3-5 production days to complete your book. Then your beautifully bound photo book is shipped, it arrives and you see how Bonté Books provides a higher quality photo book.
Hope this quick overview helped. If you have any questions with any step of the process, let us know in the comments below!
Now you can create your own photo book – get started here! As an added incentive, from today, August 11th through Sunday, August 15th ONLY use the coupon code BonteBlog40 for 40% off your order!
